Losi 5ive T - Custom Upgrade, Part 1


"the clearing" Colorado - 2008

Site menu:

Latest news:

May 14 2015:
5ive Camber Links and Turnbuckles

link »

Apr 12, 2015:
Quadcopter The Build Part 3 - Final Setup

link »

Apr 09, 2015:
LCD Monitor Mount

link »

Apr 04, 2015:
5ive - More Upgrades

link »

Losi 5ive T - Custom Upgrade, Part 1

(date: December 21 2014)

Click here to view my gallery!

Since I have everything off the truck this would be the best time to install the bump stop. I do not want to pay $26 for 4 screws so I just made my own. I did not realize that Team Fast Eddy bump stop are made out of 5mm screw until it was too late. But it worked fine even though I use 6mm screw.
Losi 5ive T - Custom Upgrade Parts Bump Stop


I think it was easier to drill the holes for the bump stops on a used chassis because the grub screw from the A-Arm already gouged a hole in the chassis. The only thing you need to do is use a center punch to mark it so the drill bit does not wander when you start drilling.
Losi 5ive T - Custom Upgrade Parts Bump Stop

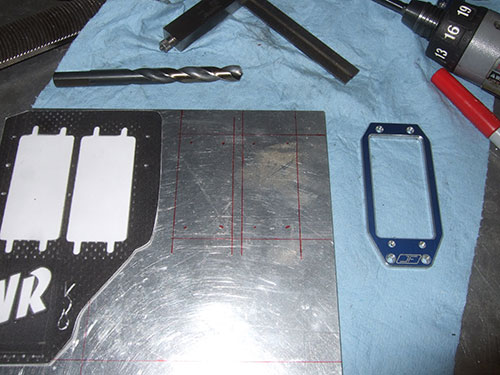
When I made the duel servo mount , I started off with a sheet of 1/4 inch thick 2024 aluminum. I wanted to use 2024 aluminum because it is quite a bit stronger than 6061. I marked the holes where the 2 servos will go.
Losi 5ive T - Custom Upgrade Parts - Aluminum Duel Steering Setup w/ Hitec Servo


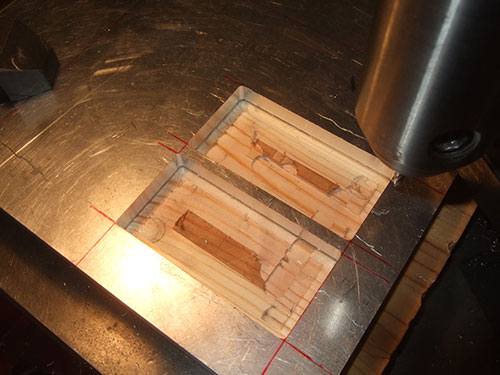
With a table top mill I machined out the 2 holes.
Losi 5ive T - Custom Upgrade Parts - Aluminum Duel Steering Setup w/ Hitec Servo


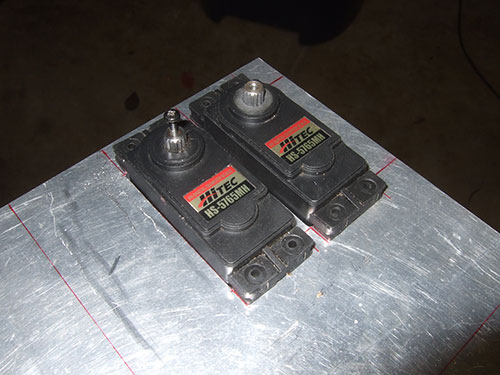
Here I am test fitting the servos, making sure the holes are big enough.
Losi 5ive T - Custom Upgrade Parts - Aluminum Duel Steering Setup w/ Hitec Servo


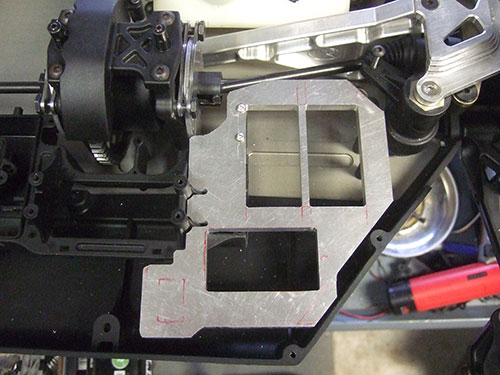
I made a temple from of the SNR servo plate and drew it on the aluminum.
Losi 5ive T - Custom Upgrade Parts - Aluminum Duel Steering Setup w/ Hitec Servo


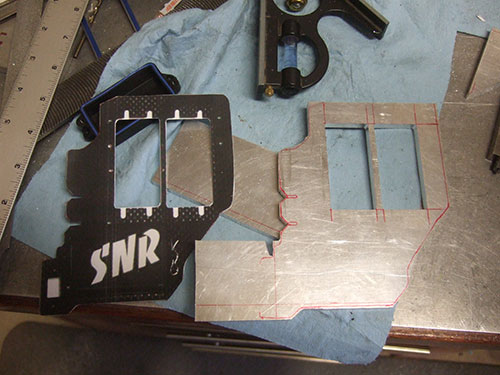
I had trim some edges to make sure it fits. I also cut another hole so the Traxxas waterproof RX box and drop right in.
Losi 5ive T - Custom Upgrade Parts - Aluminum Duel Steering Setup w/ Hitec Servo


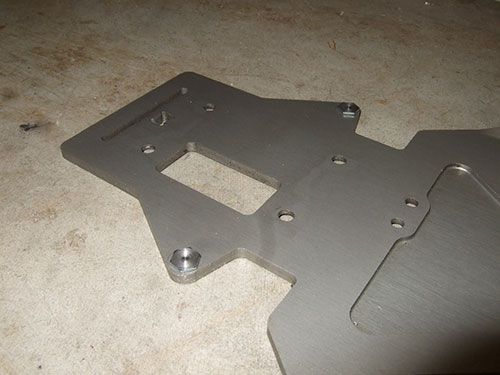
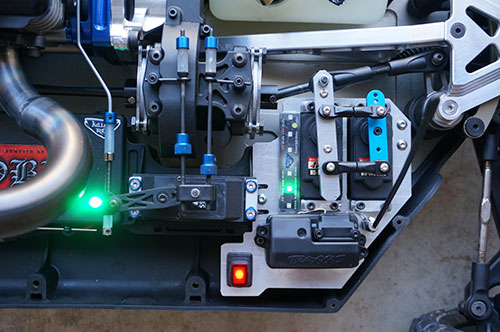
In this picture you can see how the RX box will fit.
Losi 5ive T - Custom Upgrade Parts - Aluminum Duel Steering Setup w/ Hitec Servo


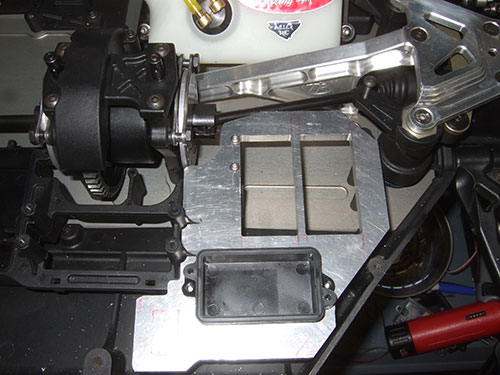
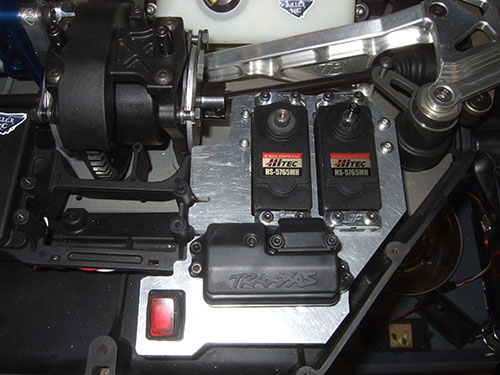
This is pretty much how this mount will look like
Losi 5ive T - Custom Upgrade Parts - Aluminum Duel Steering Setup w/ Hitec Servo


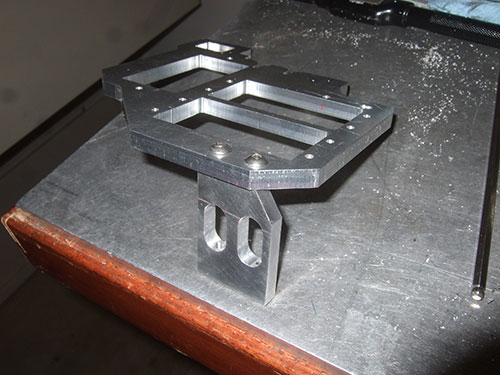
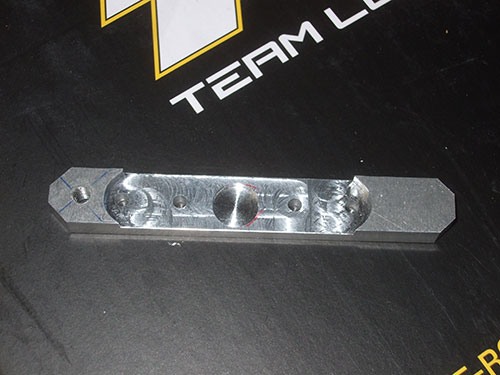
The servo plate was a bit heavier than what I like, so I tried to machine off any excess aluminum.
Losi 5ive T - Custom Upgrade Parts - Aluminum Duel Steering Setup w/ Hitec Servo


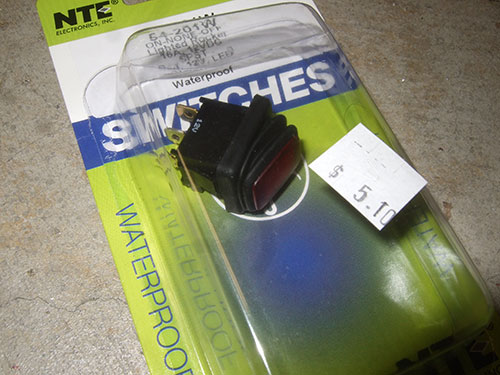
Once again I did not to pay the full retail price of this same switch that KillerRC modified so I found one online for $5.10 plus shipping.
Losi 5ive T - Custom Upgrade Parts - Aluminum Duel Steering Setup w/ Hitec Servo


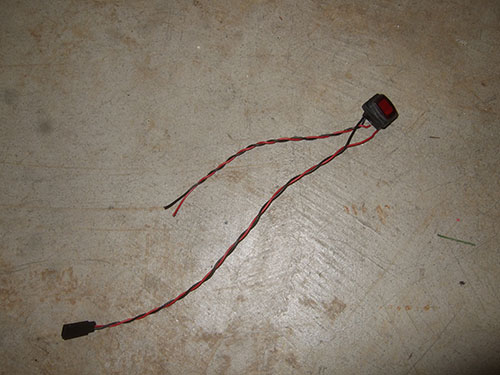
First I trimmed the ends of the terminates so it is not so long then solder some wires to the bottom of it. Let me warn you now, you have to solider it very quickly because this switch cannot take much heat. I destroyed one switch because I had my soldering iron on there for too long.
Losi 5ive T - Custom Upgrade Parts - Aluminum Duel Steering Setup w/ Hitec Servo

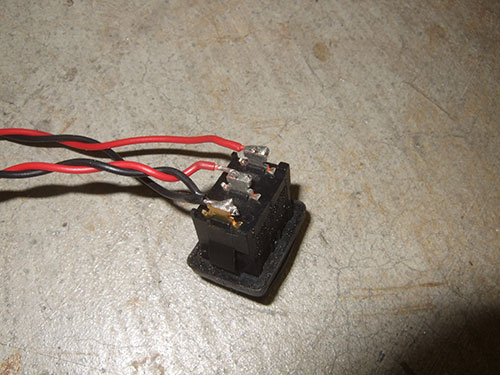
I sealed the bottom of the switch when I solder the wires with ShoeGoo so the wires will not accidently short.
Losi 5ive T - Custom Upgrade Parts - Aluminum Duel Steering Setup w/ Hitec Servo


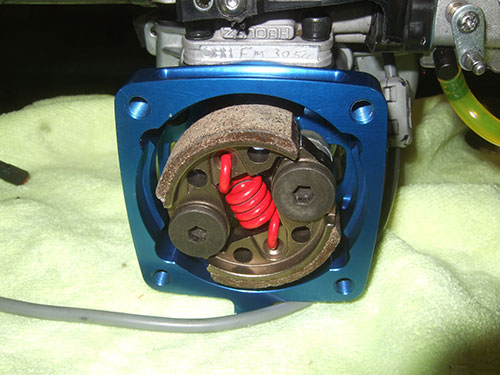
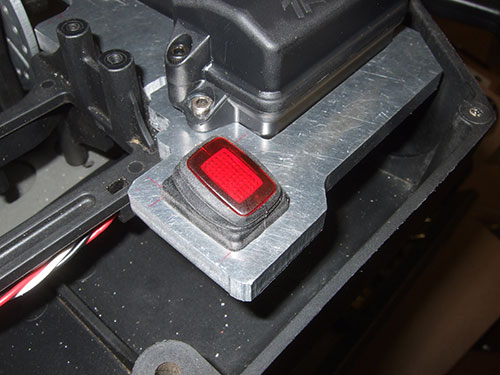
Here is how the switch looks like when its mounted to the duel servo plate.
Losi 5ive T - Custom Upgrade Parts - Aluminum Duel Steering Setup w/ Hitec Servo

Losi 5ive T - Custom Upgrade Parts - Aluminum Duel Steering Setup w/ Hitec Servo


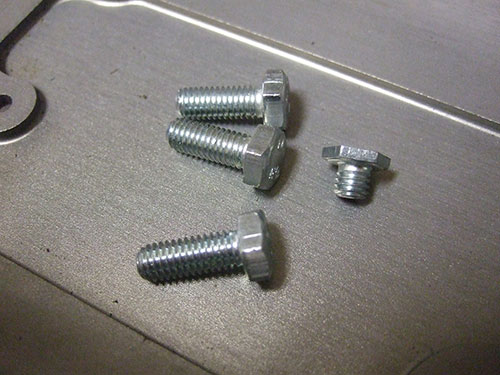
Finally the last step to this duel servo setup, the servo horns. I used the same 1/4 inch 2024 aluminum. Drilled out the hole and marked where I wanted to machine.
Losi 5ive T - Custom Upgrade Parts - Aluminum Duel Steering Setup w/ Hitec Servo

Losi 5ive T - Custom Upgrade Parts - Aluminum Duel Steering Setup w/ Hitec Servo


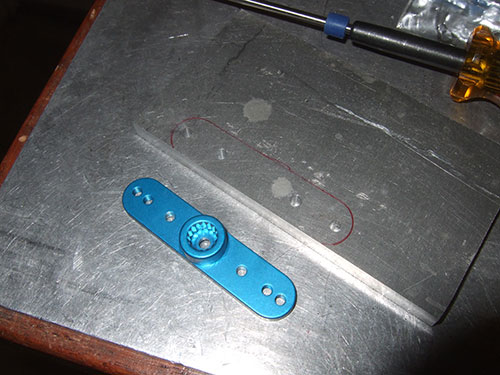
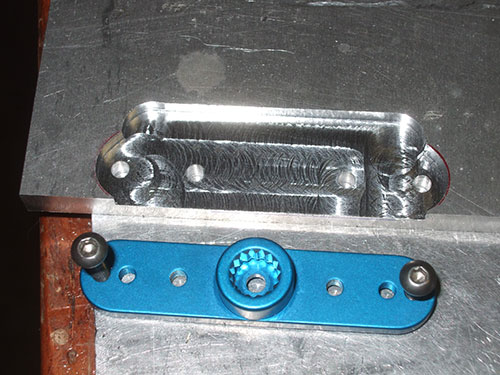
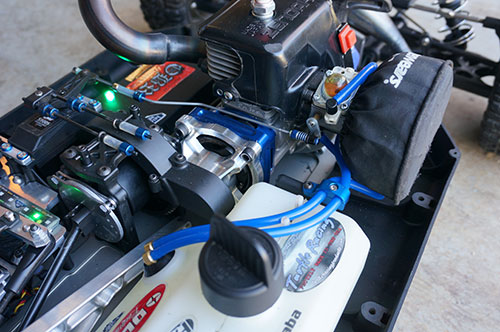
The blue servo arm has to recess in or else the steering linkage with hit it. It would be fine if I mounted the linkage to the blue servo horn but I am not. I am making this aluminum part because the blue servo horn is too short.
Losi 5ive T - Custom Upgrade Parts - Aluminum Duel Steering Setup w/ Hitec Servo


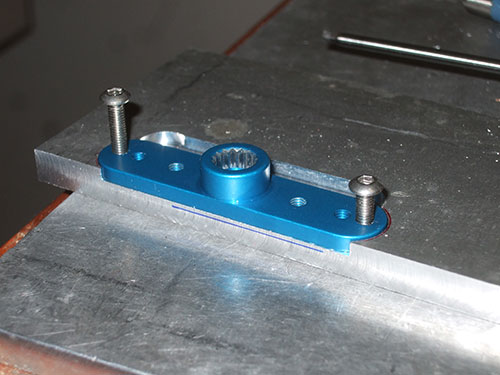
Here is the finished servo arm. I know it is not the prettiest looking servo arm but I think it will serve its purpose.
Losi 5ive T - Custom Upgrade Parts - Aluminum Duel Steering Setup w/ Hitec Servo

Losi 5ive T - Custom Upgrade Parts - Aluminum Duel Steering Setup w/ Hitec Servo


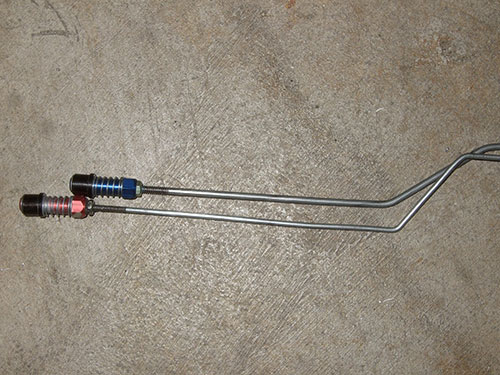
I took the rod ends from an E-Revo to connect the two servos.
Losi 5ive T - Custom Upgrade Parts - Aluminum Duel Steering Setup w/ Hitec Servo

Next up is the O'Neill Brothers Racing (OBR) Full Mod 30.5 Engine. I am guessing this is the high torque

Losi 5ive T - Custom Upgrade Parts - OBR O'Neill Brothers Racing Full Mod 30.5 Engine - Fly Wheel Fan cover screen mesh mod


Since I am using a Darksoul vented clutch housing I am not able to use the outerwears  crankcase cover. I used window screen mesh and epoxy it to the inside of the crankcase. I used a little bit of CA glue first to hold the mesh in place first. Then I apply the epoxy afterwards.
Losi 5ive T - Custom Upgrade Parts OBR O'Neill Brothers Racing Full Mod 30.5 Engine - Fly Wheel Fan cover screen mesh mod


Here is the mesh after I trimmed the excess.
Losi 5ive T - Custom Upgrade Parts OBR O'Neill Brothers Racing Full Mod 30.5 Engine - Fly Wheel Fan cover screen mesh mod


This is how it looks from the outside.
Losi 5ive T - Custom Upgrade Parts OBR O'Neill Brothers Racing Full Mod 30.5 Engine - Fly Wheel Fan cover screen mesh mod


I swapped the stock Zenoah Flywheel with a CY lightened and balanced version.
Losi 5ive T - Custom Upgrade Parts OBR O'Neill Brothers Racing Full Mod 30.5 Engine - Lighten Flywheel

I am not really sure if it really makes that much of a difference with this flywheel.
Losi 5ive T - Custom Upgrade Parts OBR O'Neill Brothers Racing Full Mod 30.5 Engine - Lighten Flywheel


The original clutch that came with the Losi was only a standard CY clutch with 8K spring. I swapped it out for a High Response version with a 8K spring. The only difference between the 2 clutch is the 4 extra holes drilled in the High Response clutch. I also replaced the CY clutch housing with a Darksoul Vented Clutch version to keep things running cooler.
Losi 5ive T - Custom Upgrade Parts OBR O'Neill Brothers Racing Full Mod 30.5 Engine - Darksoul Vented Clutch Housing with 8K High Response Clutch


Since the pullstart was broken I replaced it with Turtle Racing v2 Billet Starter Assembly.
Losi 5ive T - Custom Upgrade Parts OBR O'Neill Brothers Racing Full Mod 30.5 Engine - Turtle Racing v2 Billet  Starter Assembly


I replace the whole clutch housing and clutch bell to a Bartolone Racing Billet Clutch Carrier and Vertigo Hex Drive Vented Clutch Bell with a 21T pinion.
Losi 5ive T - Custom Upgrade Parts OBR O'Neill Brothers Racing Full Mod 30.5 Engine - Bartolone Racing Billet Clutch Carrier Vertigo 21T Gear and  Adjusting Inserts Vertigo Hex Drive Vented Clutch Bell


I do not like the "red"  Quick Release Aluminum Ball Connector so I changed it to a blue one. The main reason why I did that is not only because of the color but the blue one uses a thicker rod. The red connector uses a 2-56 size rod and the blue one uses a 4-40.
Losi 5ive T - Custom Upgrade Parts OBR O'Neill Brothers Racing Full Mod 30.5 Engine - sullivan 4-40 Quick Release Aluminum Ball Connector with Locking Sleeve

Here is a picture of my testing to make sure all the electronics is working correctly. I also used a Direct Power Harness for all the servos and Killer RC Smart Volt Meter.
Losi 5ive T - Duel Servo Mount


In this picture you can see the new blue fuel lines with FFRC High Flow machined brass fittings and TGN aluminum fuel clamp.
Losi 5ive T - FFRC High Flow TGN Fuel Clamp

Losi 5ive T - Top View


Here I tried to make the body stronger by using DDM's Body Edge Trim along the edges.
Losi 5ive T - DDM Body Edge Trim for R/C Bodies


The DDM Body Edge Trim goes around the whole body.Losi 5ive T - DDM Body Edge Trim for R/C Bodies


Here is a closer shot of the DDM's Body Edge Trim and how it stiffens up the body by sharing the load throughout all of the body and not just the weakest and thinnest spots.
Losi 5ive T - DDM Body Edge Trim for R/C Bodies


This is the bottom side of the body. Do you see the little white patched behind the front wheel wells? That is where I repaired the cracked body with fiberglass cloth and ShoeGoo.
Losi 5ive T - DDM Body Edge Trim for R/C Bodies


Here is a close up shot of the repair.
Losi 5ive T - DDM Body Edge Trim for R/C Bodies


I replaced the Futaba 3PMX FASST radio with a Futaba 4PX and R614FS reciever.Losi 5ive T - Futaba 4PX Radio System


Here are the three 1/5 scale cars:

  • Electric HPI Baja 5B w/ Castle Creation Brushless System
  • Gas HPI Baja 5T w/ OBR FMLR 29.5cc
  • Gas Losi 5ive T w/ OBR FM 30.5cc

Losi 5ive T HPI Baja Brushless Flux Castle Creation Baja 5T Kraken TSK Class 1


>>To continue to More Upgrades, Part 2, click here...


back to top